
There are 14 Falcone Fortunes located across the different districts of Gotham in LEGO Batman: Legacy of the Dark Knight. After the introductory heist during one of the story missions, you will unlock access to a few of these, with the remaining ones gradually becoming available as you complete the earlier Fortunes. The guide below for LEGO Batman Legacy includes a table with coordinates, image locations, and detailed explanations for all of the puzzles associated with each Falcone Fortune.
LEGO Batman Legacy of the Dark Knight Collectibles Guide & Locations
Find LEGO Batman: Legacy of the Dark Knight collectible locations, including Red Bricks, Batcave collectibles, currencies, and upgrade resources.
All Falcone Fortune Overview
|
Name |
Coordinates |
Image |
|---|---|---|
|
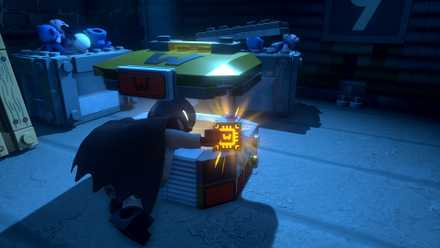
The Heist |
311, 626 |

|
|
Meow-t of Office |
184, 154 |

|
|
Hush, There’s Money |
272, 322 |

|
|
Broke Into the Old Gotham Apartment |
344, 393 |

|
|
Safe and Sound |
354, 256 |

|
|
High Ground |
157, 445 |

|
|
No Heist Too Tough |
350, 320 |

|
|
The Heist Must Go On |
274, 381 |

|
|
Pure and Symbol |
366, 701 |

|
|
Anyone Home? |
232, 359 |

|
|
Storage Doors |
214, 442 |

|
|
Cut Glass in case of Heist |
381, 848 |

|
|
Stealing Office Supplies |
330, 942 |

|
|
The Falcone Fortune |
288, 155 |

|
For more on tools like Batarangs and drones, check our Gadgets & Upgrades Guide.

Does LEGO Batman Legacy of the Dark Knight Have Cheats?
LEGO Batman: Legacy of the Dark Knight does not use old-school cheats, but rewards, cosmetics, and Stud bonuses still exist.
All Falcone Fortune Solution in LEGO Batman: Legacy of the Dark Knight
The Heist (Story Related)
- Inside the puzzle room, first head into the room on your right and use Batman’s hook gadget to pull the shelf, causing the blue Owl book to fall down.
- Place the book back into the correct shelf, which is the left shelf for this book.
- Now enter the room on the left and switch to Catwoman.
- Use her whip to open the vent, then call in her cat.
- Go through the vents and press the red button on the other side.
- You will enter a room with two statues on either side.
- Use Catwoman’s whip so the statues face the same direction as the images behind them.
- Two whip hits on each statue should be enough.
- Grab the orange Pig book and place it in the right shelf.
- Head inside to find a safe.
- Rotate the lock until the arm lines up with the gap area.
- Repeat this process three times to complete the first Falcone Fortune.
Meow-t of Office
- Head into the room on the right and use Batman’s hook gadget to reveal a vent.
- Switch to Catwoman and make her cat crawl through the vent to grab the key from the desk.
- Bring the key back and use it to open the door.
- Inside, you will find the safe which must be cracked using the same method as before.
Hush, There’s Money
- To enter the apartment, blow up the canisters to reveal a mechanism that Catwoman can interact with using her whip.
- This opens the glass, allowing you to drop inside.
-
Room 1:
- As Catwoman, whip the two nuts above the door and then interact with the mechanism in the middle.
-
Room 2:
- Switch to Batman and use his X-Ray Vision to reveal the Owl painting on the left.
- Press the button to open the door leading to the third room.
-
Room 3:
- Head into the third room and look to the left of the doorway to find a plant you can break, revealing a lever.
- Install the lever onto the missing statue.
-
From left to right, the solution is:
- Turn the sword statue so it faces the sword collection.
- Ignore the shield statue.
- Turn the hammer statue to face right.
- Turn the staff statue around completely.
- Once all statues face their matching weapon collections, the safe will open.
Broke Into the Old Gotham Apartment
- As you enter the apartment, move the TV on your right backward and destroy the cobwebs behind it.
- Continue into the next room and then enter the room on your left to find a lever sitting on top of a shelf.
- Break it loose and carry the lever back to the cobweb-covered compartment.
- Once you install the lever, a statue will appear.
- Use Catwoman’s whip once to grab the key.
- Use the key to unlock the safe room.
- Inside, crack the safe and leave.
Safe and Sound
- As Batman, pull the shelf using his hook gadget to reveal a vent.
- Switch to Catwoman and send her cat through the vent.
- In the next room, jump upward to find another vent.
- Press the button to open the door leading to the safe room.
-
For this puzzle, you need to place the books into their correct shelves:
- Near the entrance of the apartment, grab the Knight book and place it into the second shelf.
- Pick up the Rook book from the chair in the same room and place it into the third shelf.
- Go outside and find the Pawn book next to another shelf. Do not bring it inside yet.
- Place the Pawn book into the nearby shelf to open a hidden room.
- Grab the Queen book and place it into the fourth shelf.
- Finally, return for the Pawn book and place it into the first shelf to access the safe.
High Ground
- Head downstairs and defeat all enemies in the area.
- Once the area is clear, look to the left of the vault to find a switch that opens the gate.
- Inside is the first ID card.
- Use the ID on the vault and head upstairs.
-
As Batman:
- Place explosives on the wall and defeat the enemy inside.
- Destroy everything in the room to reveal two switches on either side as well as the orange Pig book that belongs on the shelf.
-
After placing the book correctly:
- A mechanism will appear beneath the painting.
- Use Catwoman’s whip to rotate the painting twice, powering the switches.
- Make both characters stand on the switches to obtain the second ID card.
- Insert the second ID into the vault door to access the safe.
No Heist Too Tough
- You need Batgirl unlocked for this.
- Use her Batarang to hack the switch and enter the office.
- Inside, hack the two robots.
- Look toward the wall on your right that Catwoman can cut through.
- After cutting the wall, use Batman’s hook gadget to create an opening.
-
Switch to Batgirl:
- Fly her drone through the opening, past the lasers, and into the next room.
- Scan the code written on the wall.
- Use the code to unlock the safe room.
- Switch back to Catwoman and move through the laser room to reach the safe.
The Heist Must Go On
- As you enter the office, defeat the enemy patrolling the safe room door.
- He carries the first ID card, so make sure to pick it up.
-
You now have two options:
- Move the bookshelf on the right side of the room and send Catwoman’s cat through the vent to press the switch.
- Or defeat the enemies in the other rooms and activate the switch from there.
- Inside the room, use Batman’s X-Ray Vision to reveal a hidden button beneath the plant on the table.
- Press it to receive the second ID card.
- Insert both ID cards into the door to open it and crack the safe.
Pure and Symbol
- Use Batman’s hook gadget on the hook to the right to reveal a mechanism that Catwoman can whip.
- Cut through the glass and enter the room with a switch on the side.
- Open the door and head into the kitchen area.
-
In the kitchen:
- Use Batman’s hook gadget to obtain the “Golf” frame.
- Place it into the right slot.
- Destroy the computers on the right to find a key.
- Use the key to unlock the next room.
-
Inside the room:
- Collect the “Money” frame and place it into the left slot.
- Return to the previous room and use Catwoman’s cat to crawl into the vent above.
- At the end of the vent is the “Tie” frame.
- Place it into the middle slot to unlock access to the safe.
Anyone Home?
- Break the boxes on the left and send Catwoman’s cat through the vent.
- There is another vent beside the wooden table, so crawl through it and climb the boxes to reach the third vent.
- Move through the laser room to activate the switch.
- Switch back to Catwoman and carefully pass through the laser room to reach the safe.
- If you are hit by the lasers, simply press the button to reopen the door.
Storage Doors
- At the start, head left, ambush the enemy, and climb down the ladder.
- Climb the stairs and defeat the second enemy.
- You will find a wall that Batman can spray with explosives.
- Inspect the block on the ground featuring Penguin’s image.
- Rotate it to reveal the code “Y012.”
- This is the storage locker number you need to open downstairs.
- Open the locker using Catwoman’s whip.
- Destroy the crates and barrels on your left.
- Crawl through the vent to find the safe.
Cut Glass in case of Heist
- Switch to Catwoman and use her whip on the mechanism to your left as you enter the apartment.
- Head inside and break the fridge to obtain the first ID card.
- Insert the ID into the slot.
-
Head into the far right room:
- Move the platform so the cat can jump upward and crawl into the vent.
- In the next room, press the switch and grab the second ID card.
- Bring it back to Catwoman.
- Insert the second ID into the slot to gain access to the safe.
Stealing Office Supplies
- Use Catwoman’s whip to open the glass and enter the office.
- Head through the door behind you and use Batman’s hook gadget to open the duct.
- Crawl through the vent, defeat the enemy, and disable the cameras.
- Enter the room on the right and turn left to find a vent for Catwoman’s cat.
- Crawl through and grab the ID card from the table.
- Bring it back and use it to open the locked room.
-
In the room with the cubicles:
- Grab the Silver trophy and place it into the second position slot.
-
In the room opposite the cat vent:
- Grab the Gold trophy and place it into the first position slot.
-
In the same room as the safe:
- Cut through the glass to obtain the Bronze figure.
- Place it into the third position slot to unlock the safe.
The Falcone Fortune
- Move the trolley and grab the energy source.
- Place it into the compartment on the left.
- Go through the laser area and destroy the boxes to the right of the doorway ahead.
-
Here you will find a cat vent:
- Crawl through it into a room with several climbable boxes.
- You need to activate two switches here.
-
For the switches:
- One switch is blocked by an enemy, so use a meow to lure him away.
- The second switch is behind a metal fence, but the lowered platform now lets you reach it easily.
- Return through the vent and enter the second vent nearby.
- In the next room, grab the ID card and bring it back to Catwoman.
- Open the door and enter the vault room.
-
You now need to discover the vault code:
- The first number is “5,” found on the calendar.
- The second number is “4,” hidden behind the shelf Batman can pull using his hook gadget.
- The final number is “1,” found in the previous room where Penguin is holding a Gold trophy.
- Enter the code “514” and crack the safe.
More Lego Batman: Legacy of the Dark Knight Guides
For more collectible cleanup and Gotham exploration help, start with these guides:

- Released
-
May 22, 2026
- Franchise
-
LEGO Batman
- PC Release Date
-
May 22, 2026
